
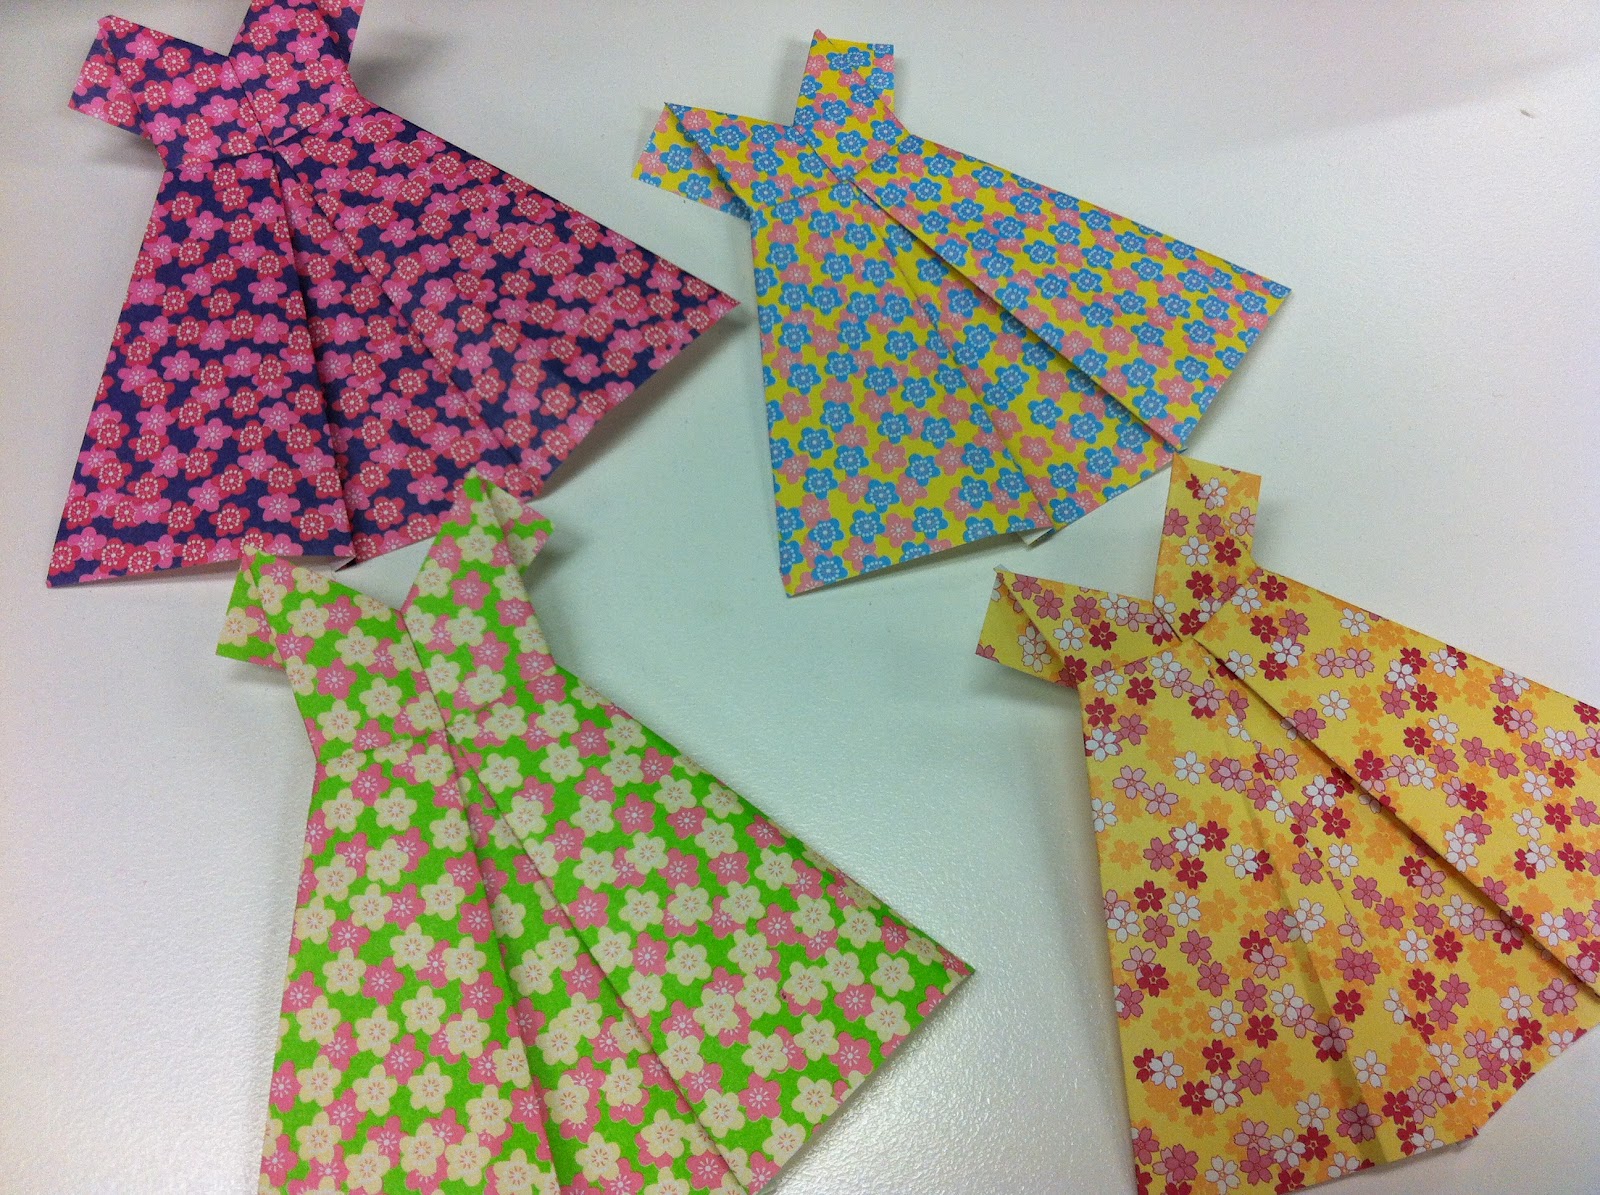
I was inspired to make an origami dress (or two, three, four... I can't stop now) after reading A Spoonful of Sugar's blog post recently. I watched NoorInaya's step by step instructions on YouTube and felt warm and fuzzy that there are so many creative people around the world who are willing to share ideas. My origami paper is from Daiso and measures 15cm square.
 |
| Step 1: Fold the paper in half (with wrongs sides together) making a crease in the centre of the paper. |
 |
| Step 2: Fold the two edges towards the centre crease that was made in Step 1. You should have 4 equally spaced creases on your paper. Lay your paper flat with the right side up. |
 |
| Step 3: With the creases at length wise, fold the two creases made in Step 2 towards the centre fold. |
 |
| Step 4: With the wrong side facing up, fold the paper almost in half, leaving a gap (in this case 1cm) from the edge. This fold determines the length of the dress hence you can vary the size of the gap. You now have a long (skirt) portion, and short (bodice) portion. |
 |
| Step 5: Make a 1cm pleat in the short portion which determines the length of the bodice (see photo). |
 |
| Step 6: Place the paper right side up with the bodice portion on top. Flaring the skirt is a bit tricky ~ grab the outer edge of the skirt portion and make a fold as far as you can. The centre should have three triangles. |
 |
| Step 7: Fold a "v" shape triangle on the bodice portion . This is to make a crease only hence unfold the "v" flap. |
 |
| Step 8: With the wrong side of the paper facing up, fold open the creases to form two triangles on each side (see photo). Note two rectangle on each side. |
 |
| Step 8: Fold the two rectangles towards the centre and form two triangles at the "wasitline" of the dress. |
 |
| Step 9: Make a sharp fold from the "wasitline" towards the bottom edge of the dress. |
 |
| Step 10: To make the sleeves, take the 2 rectangles made in Step 8 and fold as per the photo. This sleeves fold can be varied to make different sized sleeves. |
 |
Dress complete! I've embellish my dresses with ribbons and rhinestones.  |
These are fabulous :-)
ReplyDeleteSo lovely of you to comment, many thanks! :)
Delete